This guide is intended for electricians installing PhiSaver Electricity Energy Monitor Australia. Other countries may vary.
It provides general guidance. The installer takes responsibility for compliance to appropriate standards and safety.
Feel free to call with specific questions.
Equipment
Included in the enclosure is:
- IotaWatt central unit, pre-configured
- CTs (current transformers, with 1.2m lead, labelled)
- VT (voltage transformer, a plug pack)
- USB cable
- GPO with USB ports
- 4G modem and power supply
- Installation list (i.e. which circuits to clip the CTs)
- Enclosure (poly or sheet metal)
Required additional items:
- 32-50mm diameter corro and couplings
- Conduit
- Cable ties and tidying
- Power cable and GPO
Helpful extra tools:
- Phase rotation meter
- Current meter
- Hole puncher or sharp hole saws
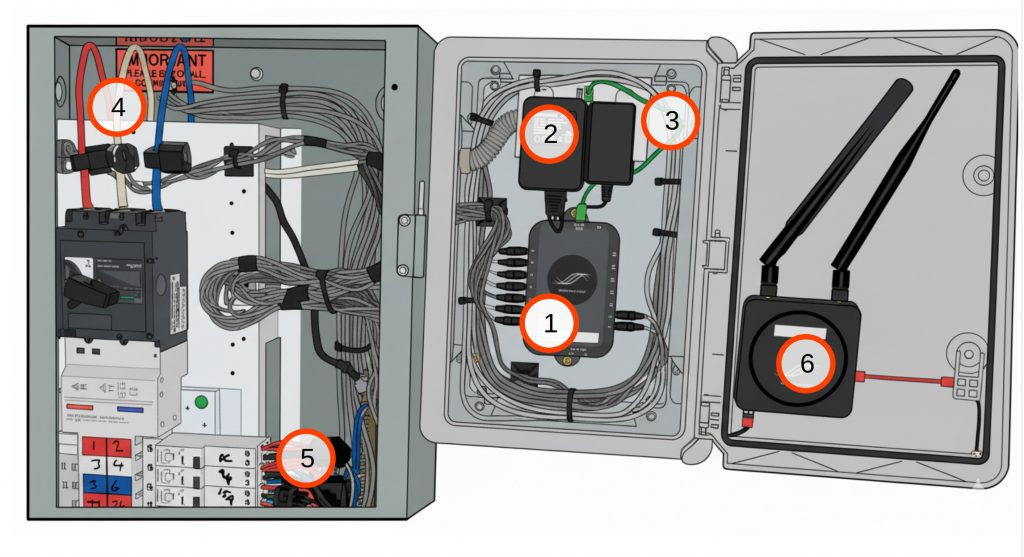
Overview
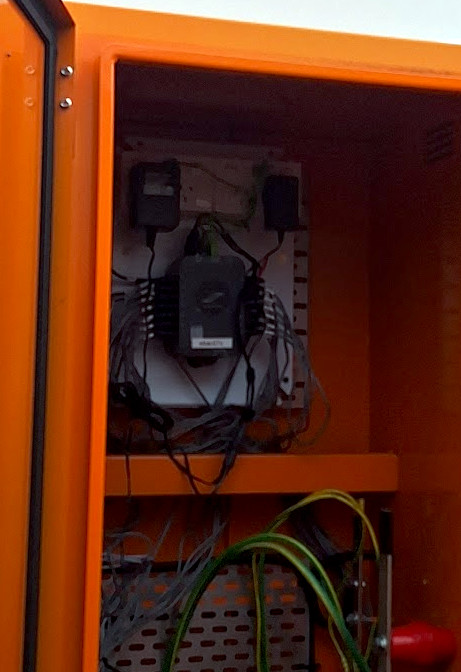
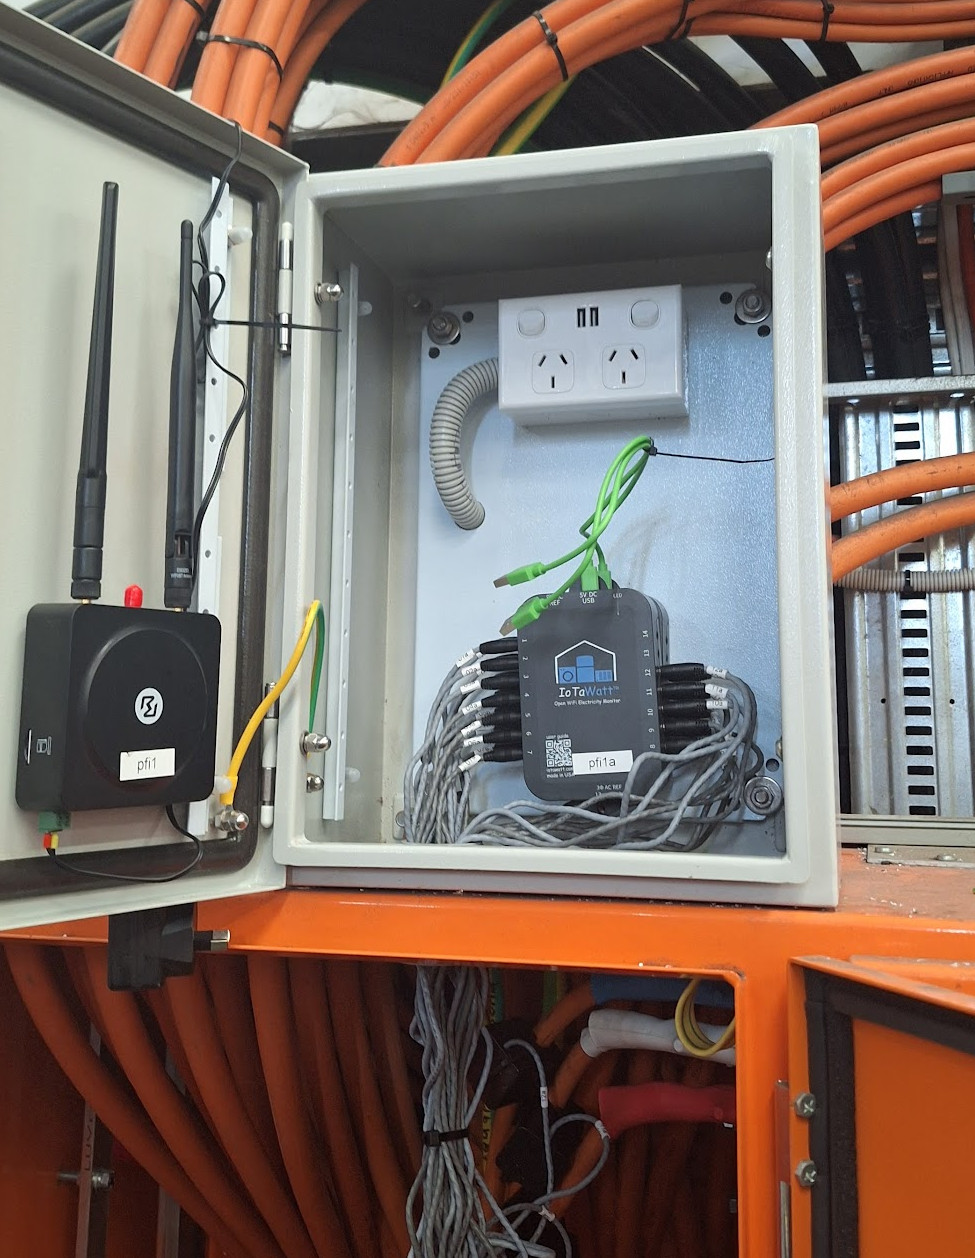
A typical install is shown below, with the switch on the left and Phisaver enclosure on the right.
- PhiSaver Unit (IotaWatt)
- 9V voltage reference in GPO
- USB power cable from GPO
- CT (Current Transformer) sensors on switchboard submains
- CT sensors on switchboard circuits
- 4G Modem with power from GPO
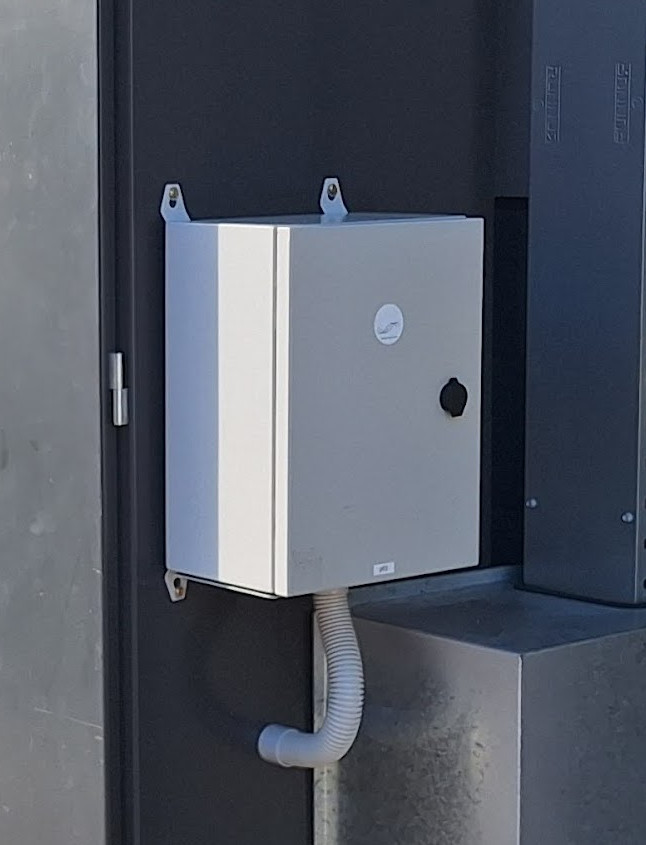
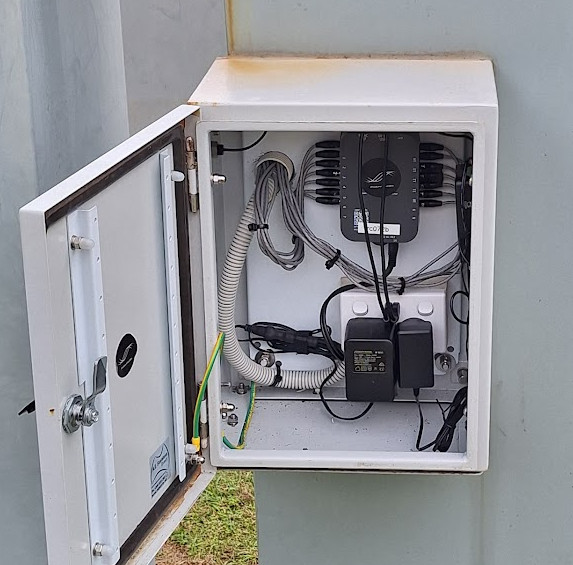
Step 1 : Mount the Enclosure
Mount the enclosure near the switchboard. Consider CT lead length, ease of access and weatherproofness. The preferred method is generally mounting externally with penetrations through the bottom.
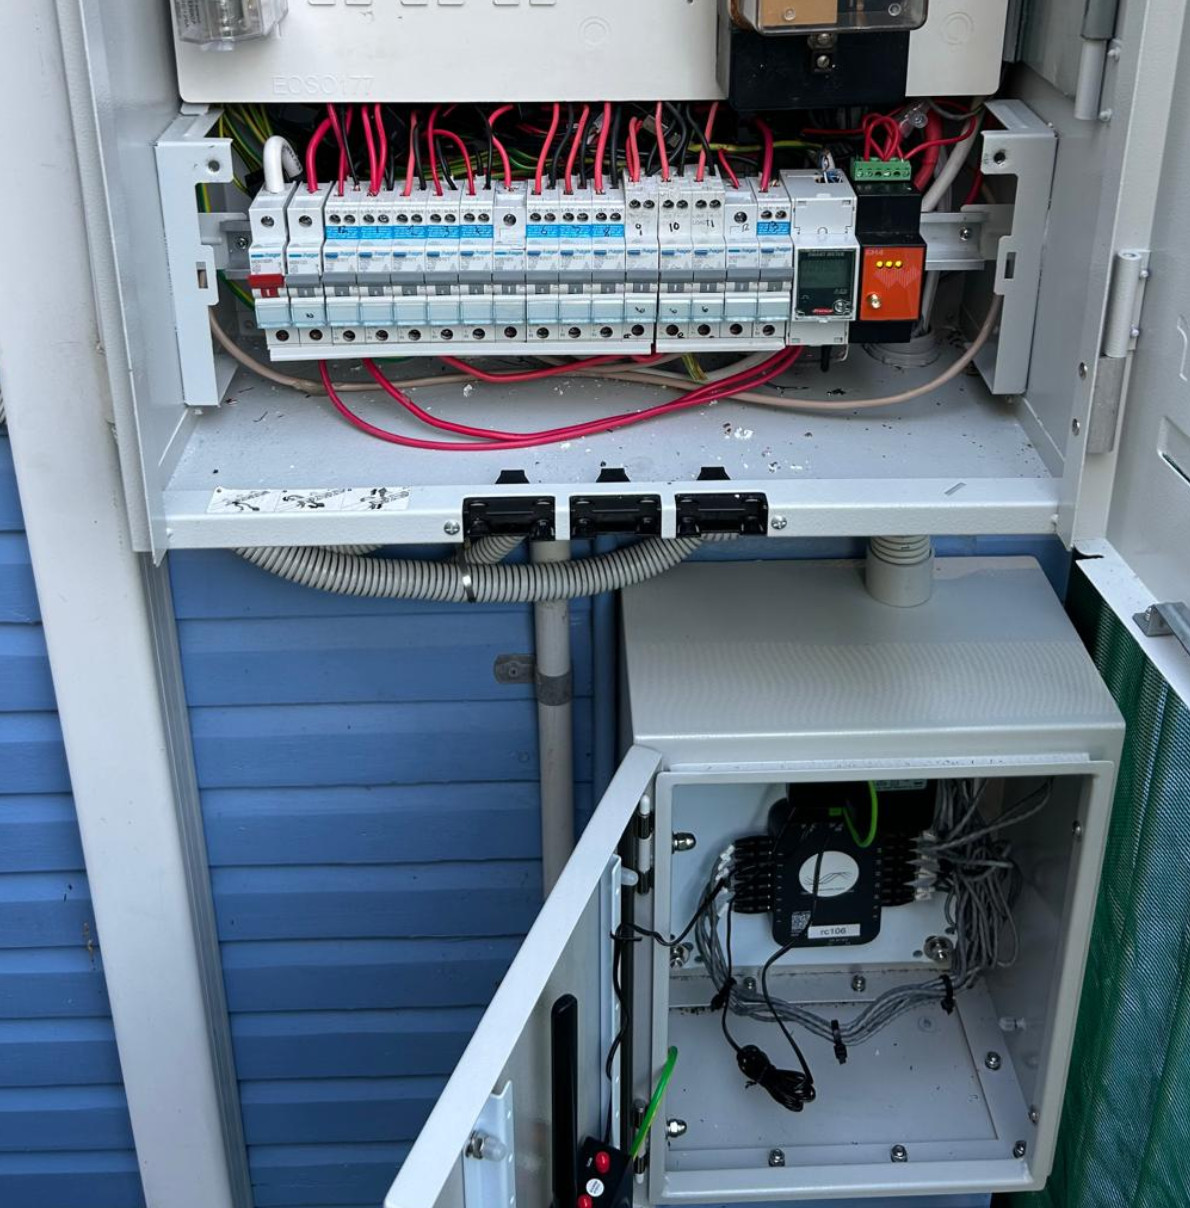
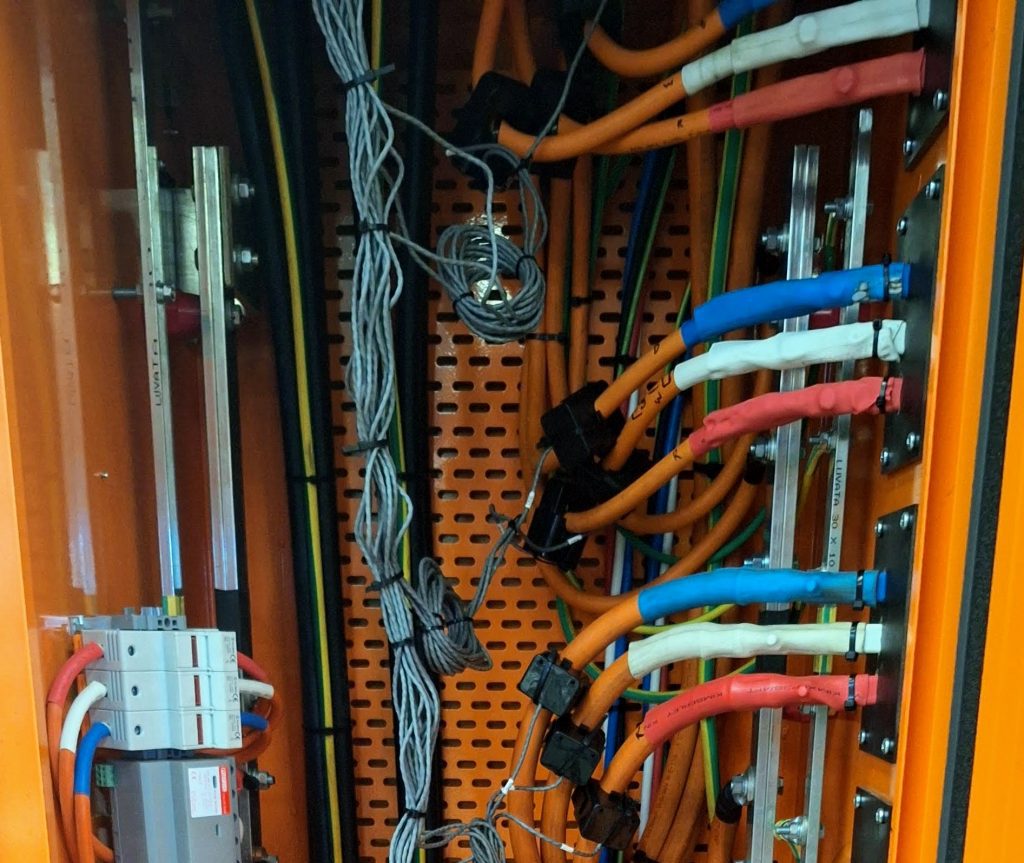
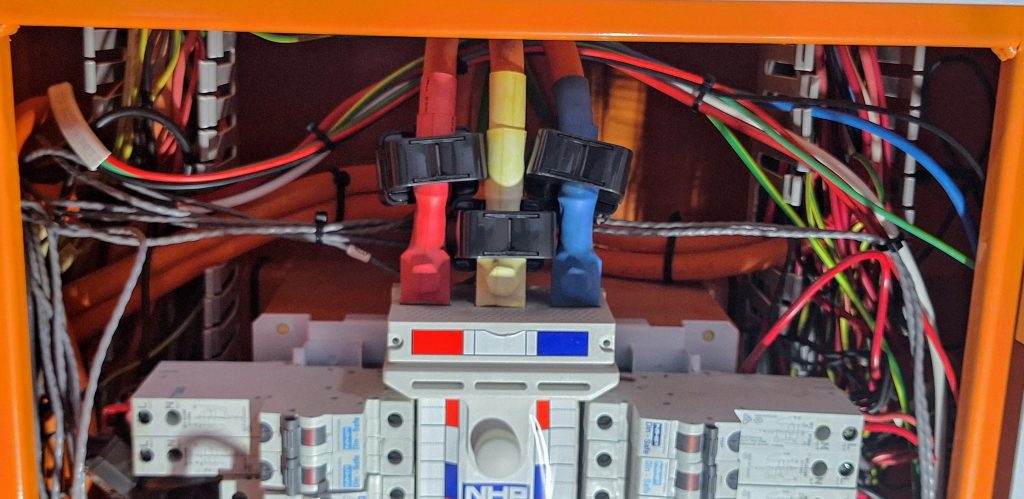
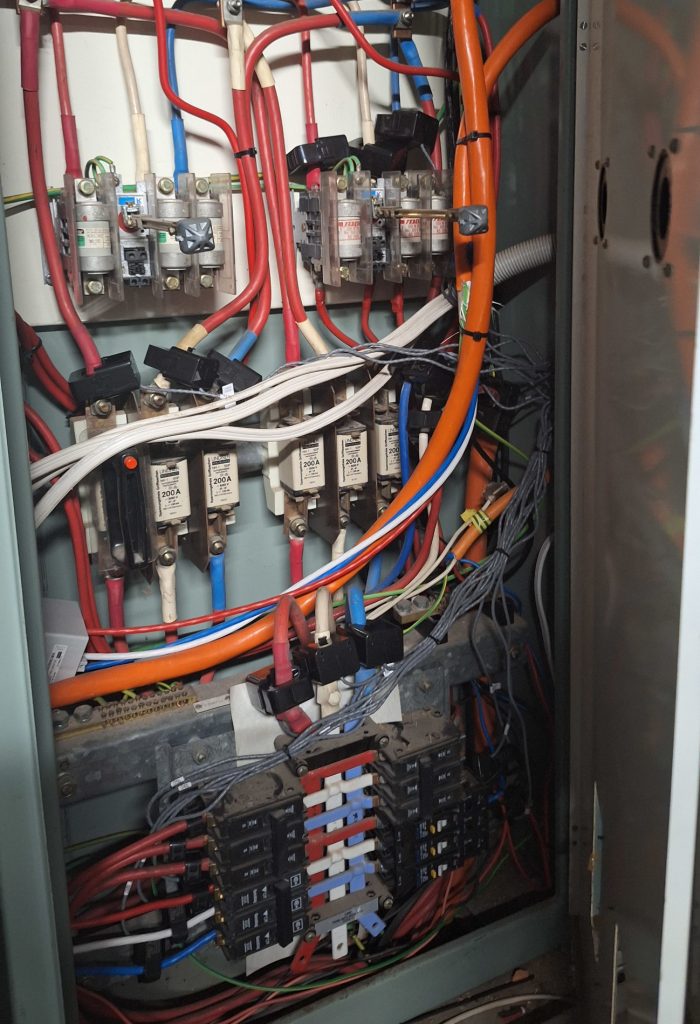
Step 2 : Install CTs
Clip each CT to the appropriate circuit – a detailed list is supplied. After clipping, route the leads to the IotaWatt via conduit. Use cable ties and tidies.
Orientate all CTs so the arrow points in the direction of current flow.
Ensure the CT ‘clips’ properly. Add support and ties for heavy VTs.

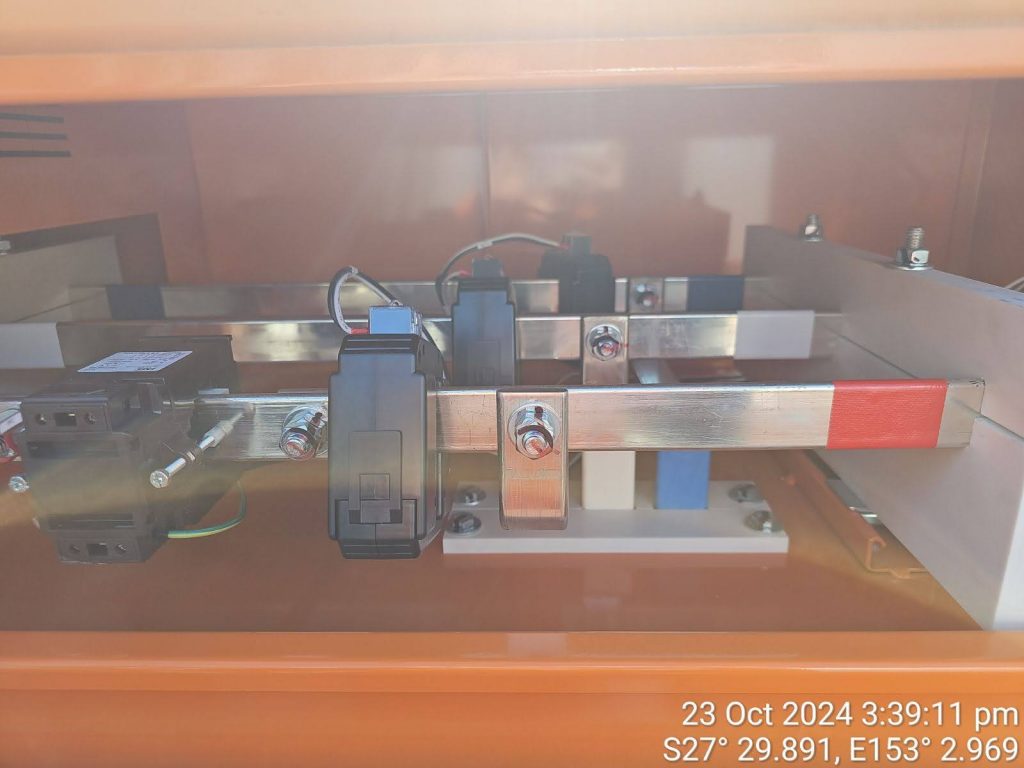
Cable zone – cable ties for neatness Submain Bus bars Behind Escutchon
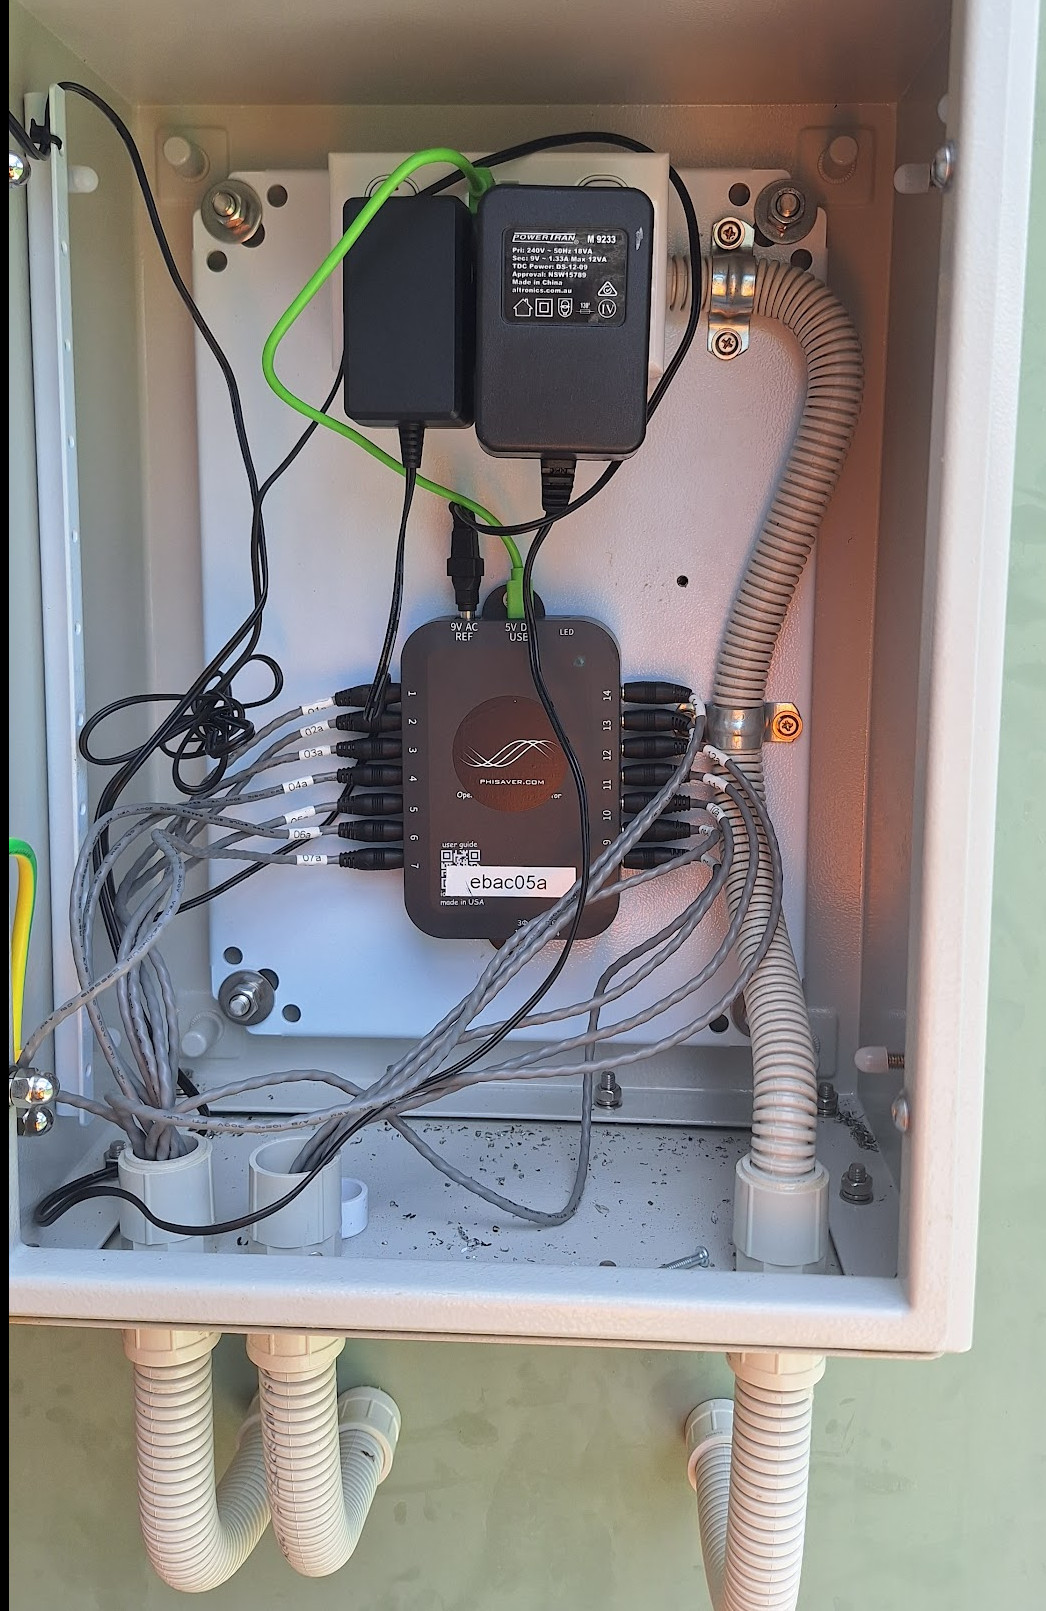
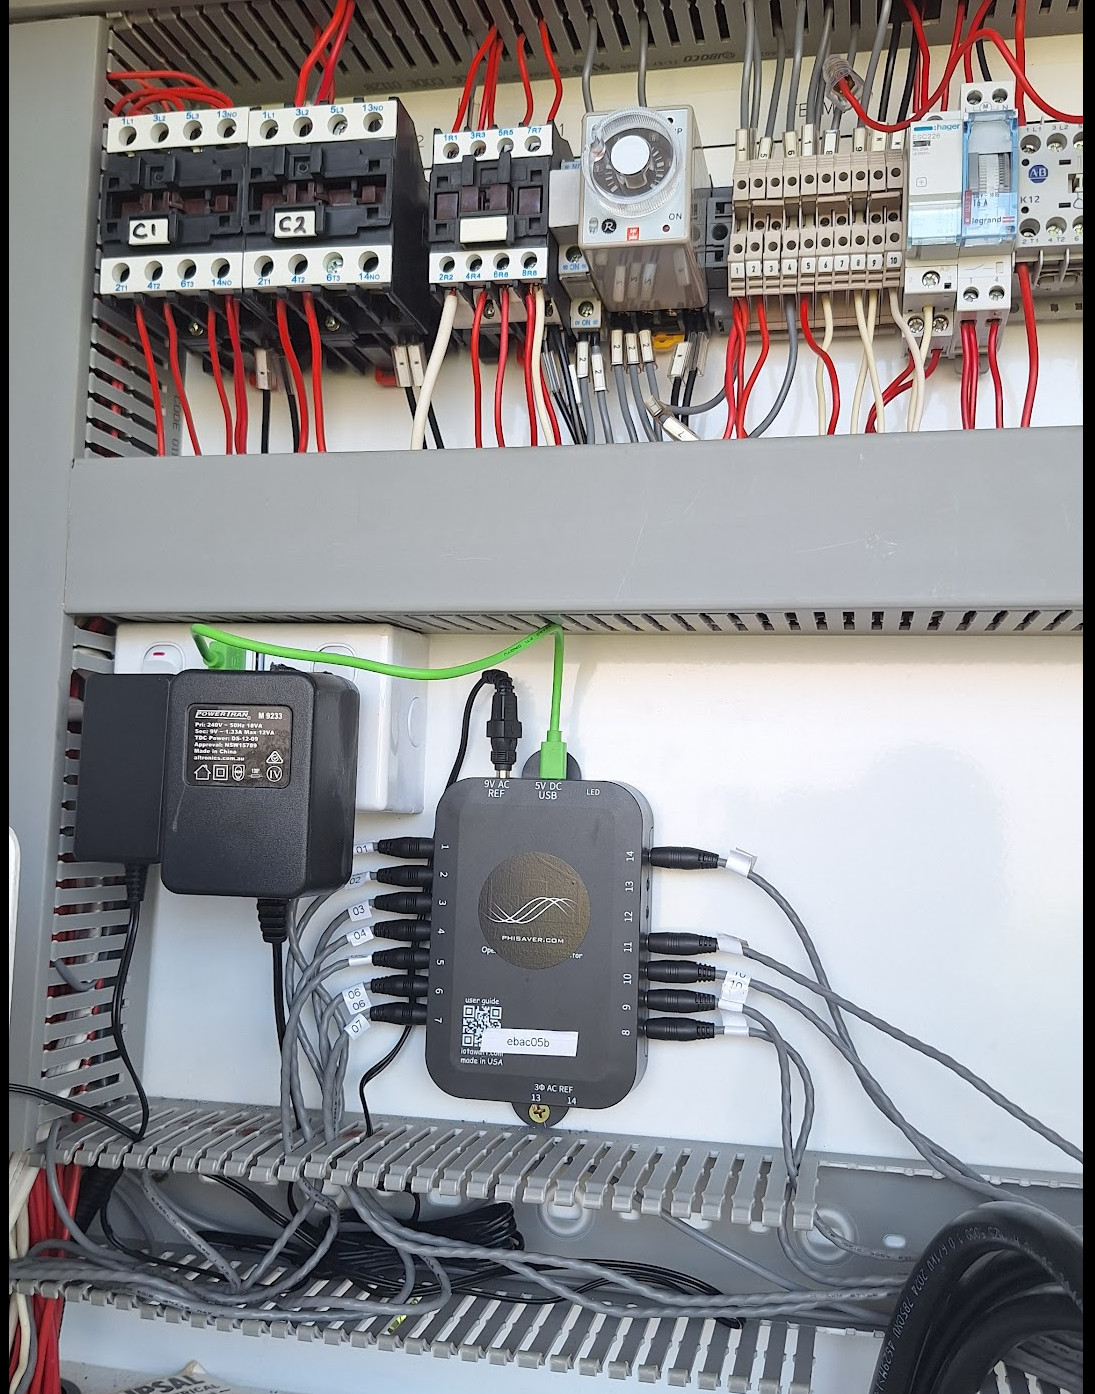
Step 3 : Plug in all cables
- Plug in CTs. Each one is numbered – use the same number on the IotaWatt.
- Plug in the AC voltage reference (the heavy plug pack and route the lead to the IotaWatt. It is labeled “9V AC REF”.
- Plug in the USB cable (green) to the GPO and route to the IotaWatt is labelled “5V DC USB”
- Plug in the power supply for the modem. It ends in a green terminal block on the modem.
Power up and Check
- Turn on power. Wait five minutes. Check the lights: green is good, red is bad.
- Pulsing green light on the IotaWatt is good (1 light, hard to see)
- Solid green on the modem (5 lights, hard to see)
- Phone PhiSaver +61 423 385 624 for final validation
Tips, Tricks and Traps
- Review it and call PhiSaver before you start. Any time.
- Check each CT: right circuit, right number, CT is clips together and pushed into 3.5mm jack.
- Use cable tidies, wraps, etc to keep it neat and sane.
- Use 40mm corro for easier threading of CT cables.
- Use a seperate corro or peno for GPO power.
- Green lights on IotaWatt and modem.
- Good hole saws (or a puncher) make life easier.
- If you need a special enclosure, we can provide
- Don’t penetrate top of enclosure (water ingress risk)